Last night I walked a friend through the steps of printing various sized photos using iPhoto. Although I’m not one for making technical tutorials, since I have the screen caps for it and get this question a lot on my YouTube channel, I thought I’d put together a little tutorial on it.
This is for Mac users who have iPhoto. Sorry, I can’t help with any other software or systems, although I’m sure there are various ways to do it on other systems as well. Also, I use the Epson PictureMate Charm, which prints onto 4X6 paper, so most of my tutorial will use that as the example, but you can do this with any printer and on any size of paper.
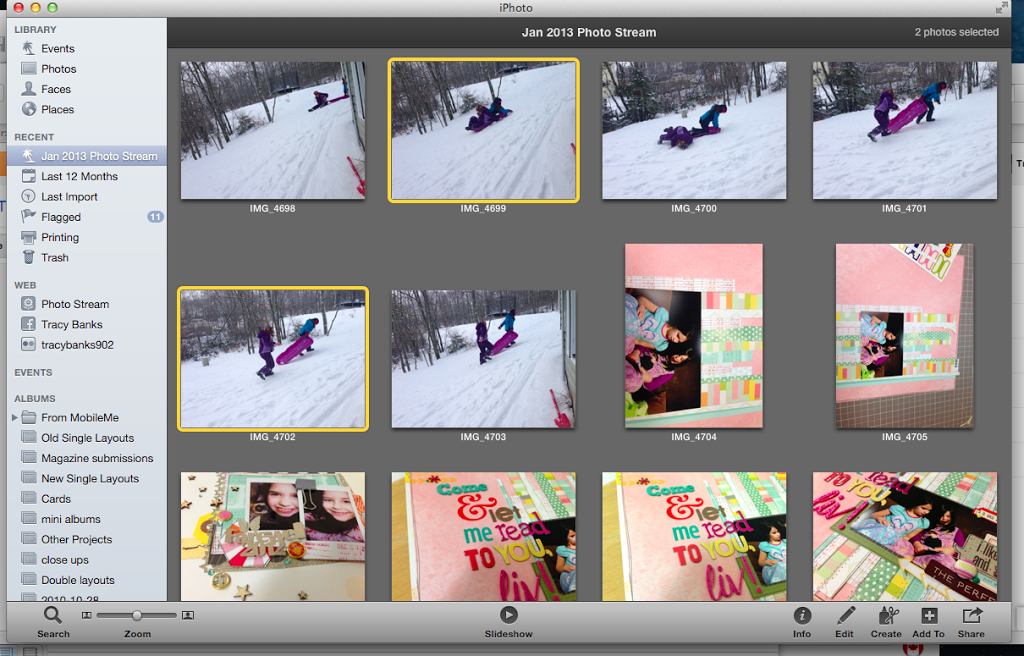
Select the pics you want to print by clicking on them (command-clicking to select more than one at a time). You will know they are selected when they have yellow borders around them. You can only print one size at a time so if you want your pics all printed at different sizes you will have to print each size separately. I’ll start by selecting these 2 pics of my kids playing in the snow:

When you select Print the following window comes up:
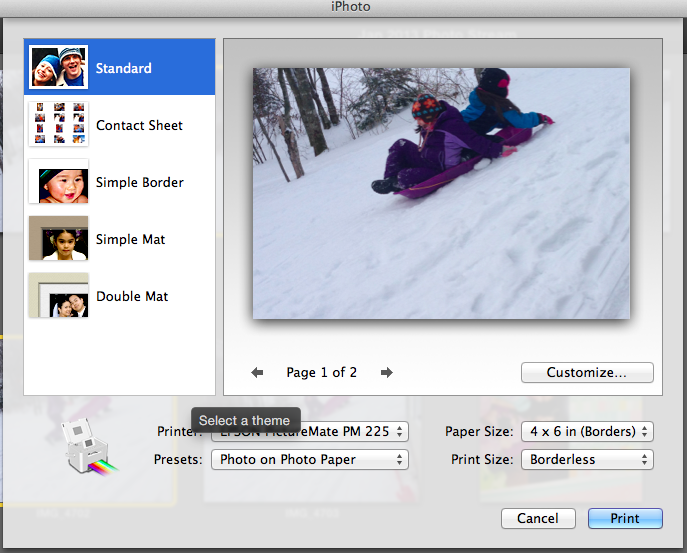
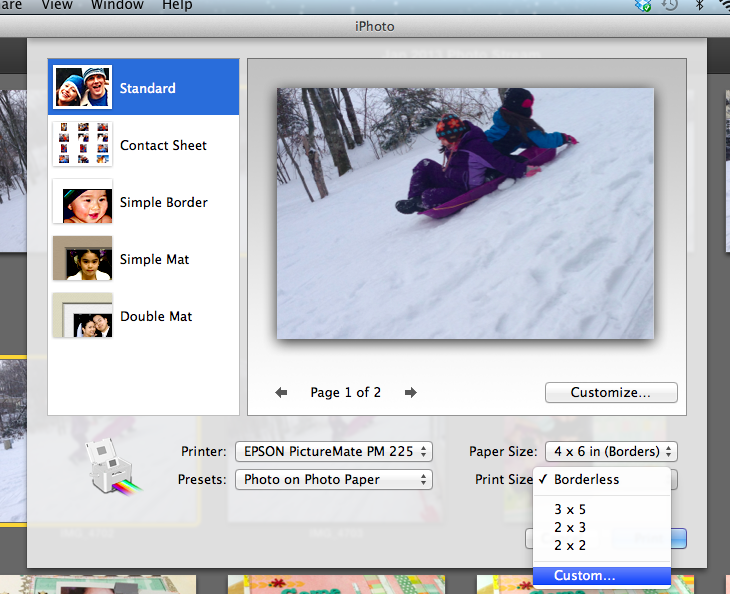
The column of options on the left side are themes you can print with. I usually just leave it as standard, but you can experiment with printing contact sheets as well. I won’t go into that here, but if you choose that, you can specify the number columns and rows, and the size of the contact pictures changes accordingly. This can be a great way to print a bunch of pics all the same size if you’re not too picky about what that size is, but are more concerned with them all fitting on a page. You can also print with various borders, but I never do that. You can see a preview of what your pictures will look like on the photo paper in this window, and that preview will change as you change the settings. You choose your printer in this window (below the preview), although you will get a chance to change it later if you forget. My printer only prints in one size (4X6) so I don’t change the paper size, but if you have a printer that prints different sizes you’ll set the paper size in this window (also below the preview). It’s the “print size” option that is most important here:
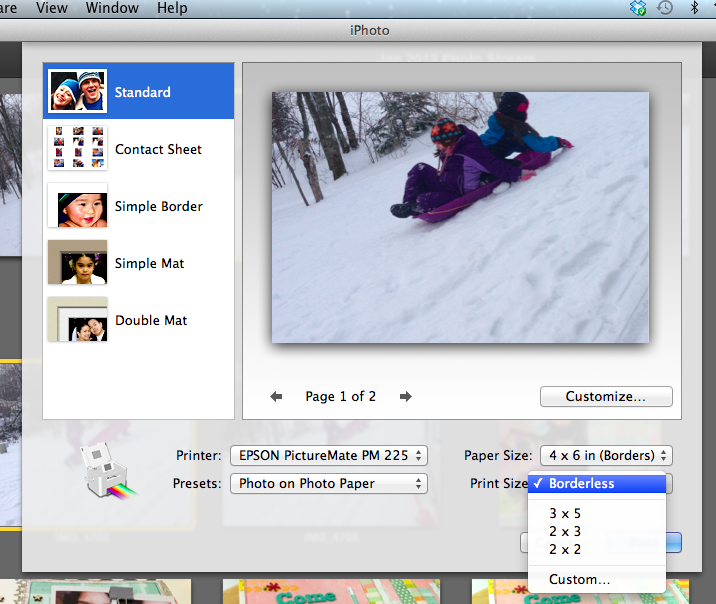
When you click on print size, you’ll get different options depending on the printer and paper size you have selected. The above drop down menu is what I see, but yours may be different. If you want to print any of these size (2X3 is convenient for Project life, for example) just select it here. If you want to print any other size, select Custom:
When you select “custom” the following window opens, where you can set the width and height. I changed mine from 4X6 to 2.5 by 3.5 but it looks like I forgot to get the screen cap of it changed. You’ll have to trust me 🙂
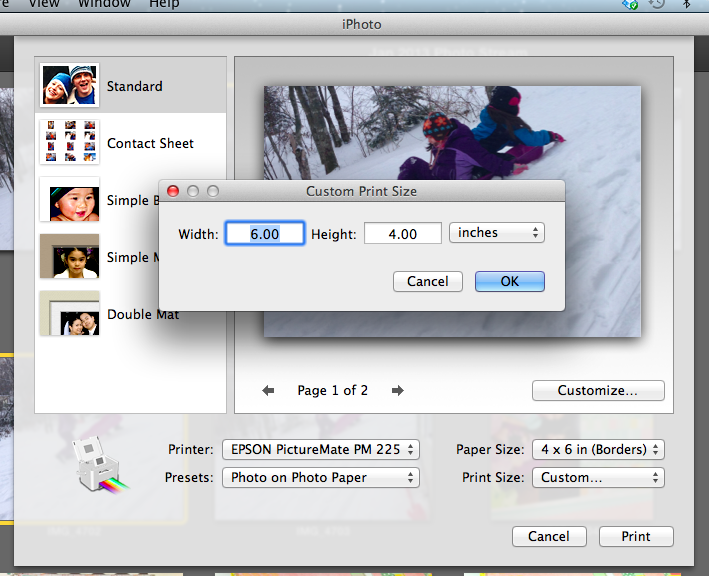
When you click ok in the above window, after changing the dimensions to whatever you want, you are brought back to this window, which has updated to rflect the change in your print size:

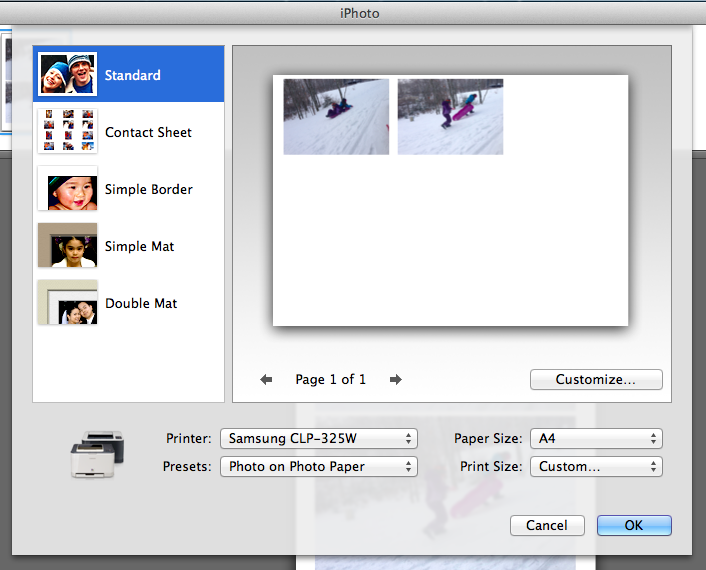
…but I’m not, so let’s go back to the 4X6 paper 🙂
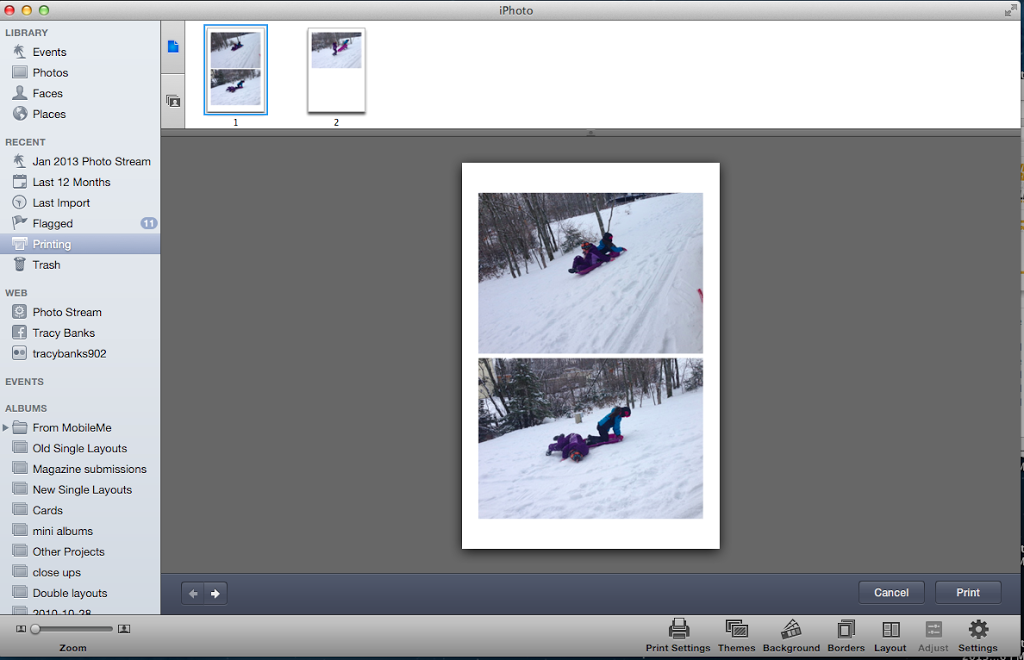
If you press the “customize” button to the bottom right of the preview, you get this window:


Or adjust the slider to zoom the photo in:
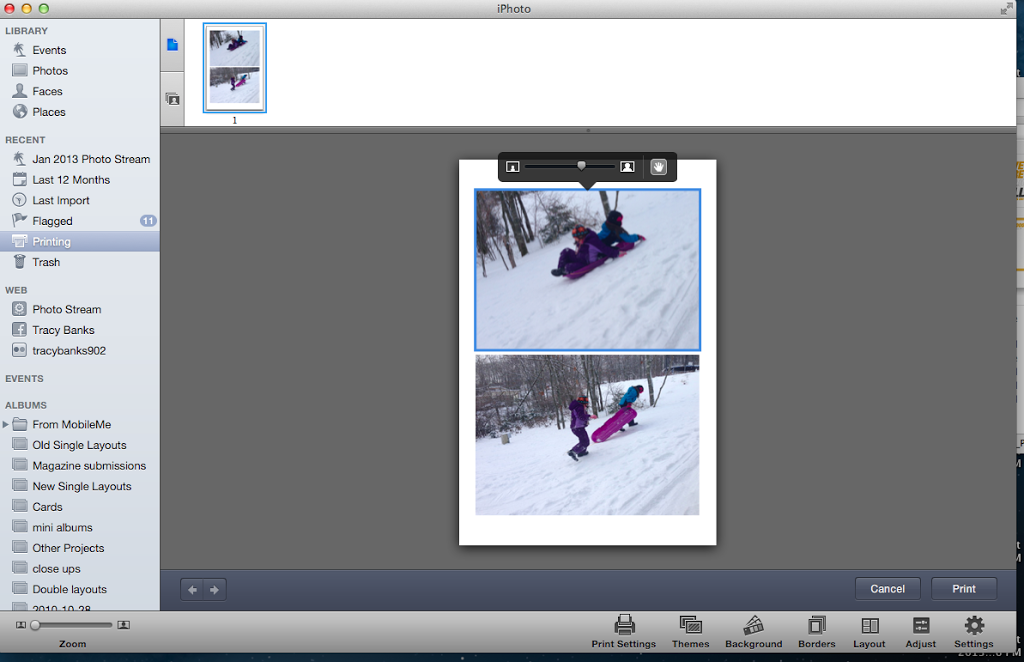
By the way, if you had selected more than 2 pics, or more than fits on one sheet, this what you’d see, and you can still adjust the pics on other sheets by clicking it in the top preview area (in the below example I’ve added a third photo to show what that would look like)